The Ultimate Ultralight Bikepacking Advice Page
Posted by Chris Futers, Lois Fife and Rob Farquhar on Jul 16, 2025
Bikepacking
Travelling on two feet can require little more than a rucksack to carry your belongings and enable you to travel far. An ultralight journey on two wheels can require a bit more thought. Some of the main factors being the terrain and the duration of the ride. Gruelling miles off road can feel very different to those on the road, and take a lot longer, but the rewards when both road riding and off-roading can still have the same effect, especially when it comes to the descents (and for those who enjoy suffering, beating that climb that seems to never end).
On a loaded bike, either for a night or two, a week or a longer tour you can forget about chasing Strava times and just enjoy the sensation of exploration. You can soak up the view and spotting things you may have never seen before.
In this article we use the experience of those who have tackled multi-week tours in Europe, long weekends along the beautiful Northumbrian coastline, carried a bike up Black Sail Pass on the Coast to Coast and found new roads and trails hidden around scenic Dorset. This guide will cover bikepacking on tarmac or something looser, sleeping in a tent or under a tarp and what you’ll need for an overnight trip to a full month's tour.
The Bike
Without going out and specifically dropping a bundle of cash on a new bike, often the bike you already have will be the bike you use for bikepacking.
The art of bikepacking is adapting your bike and making it work for your trip; allowing you to become ‘at one’ with your bike. Your bike is your rolling, self-contained transportation system.
Road/Hybrid
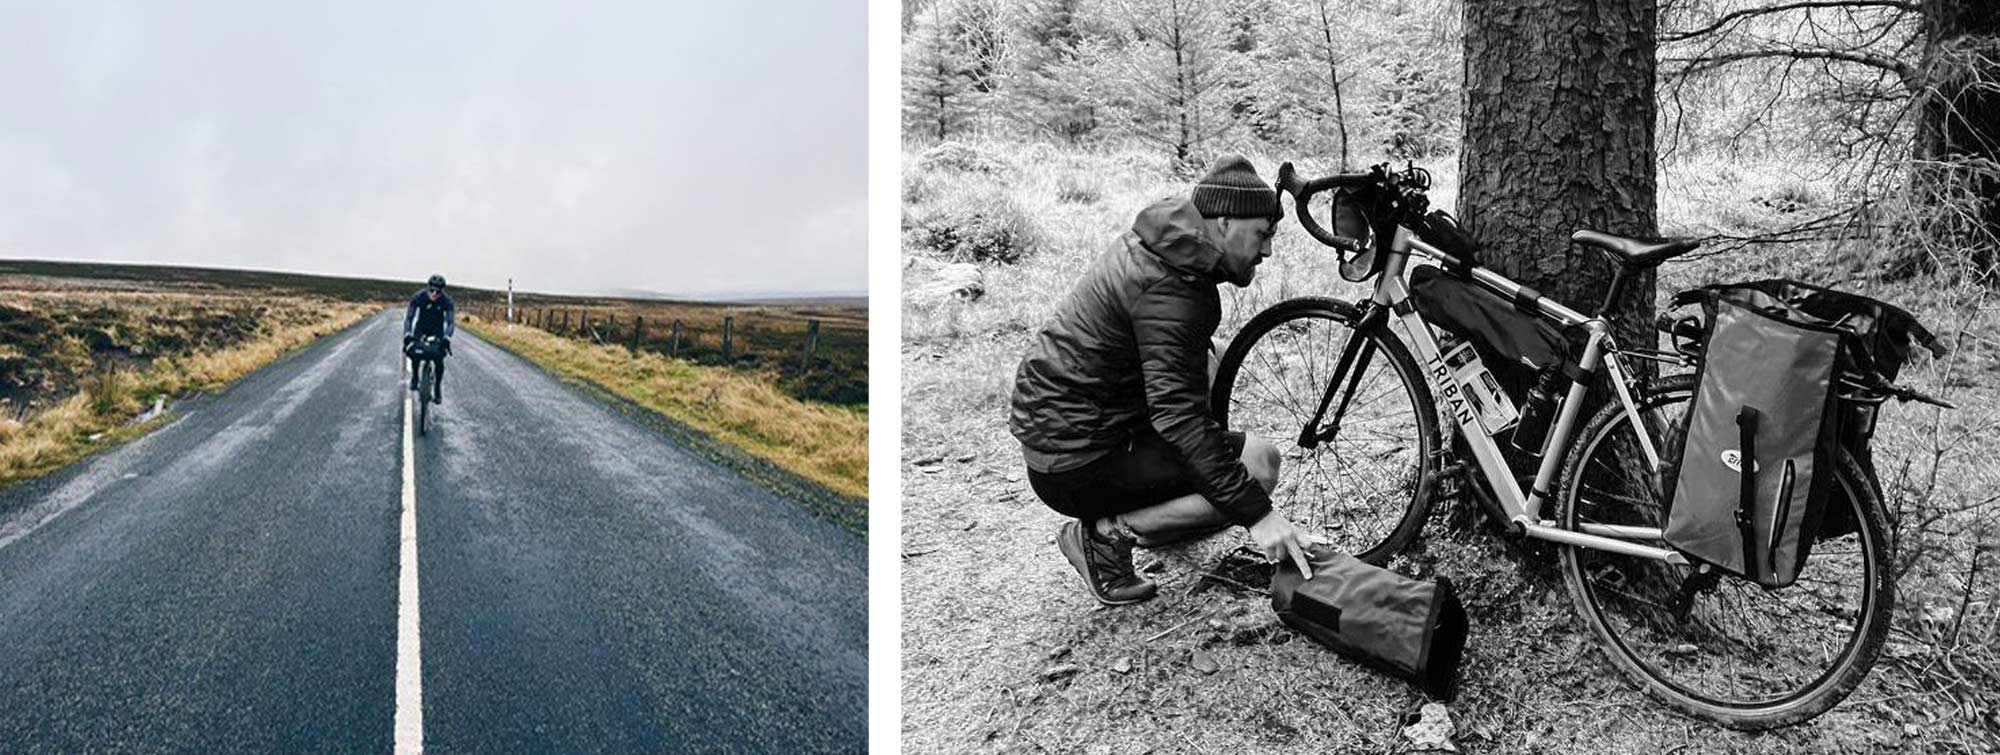
If you are planning on staying on roads and paved cycleways, then a rigid, road, touring, hybrid bike with slick or semi-slick tyres will be ideal: fast rolling and offer little resistance. Touring specific bikes often come with braze-on mounting points for attaching racks and luggage and tend to have comfortable geometry designed for spending a long time in the saddle.
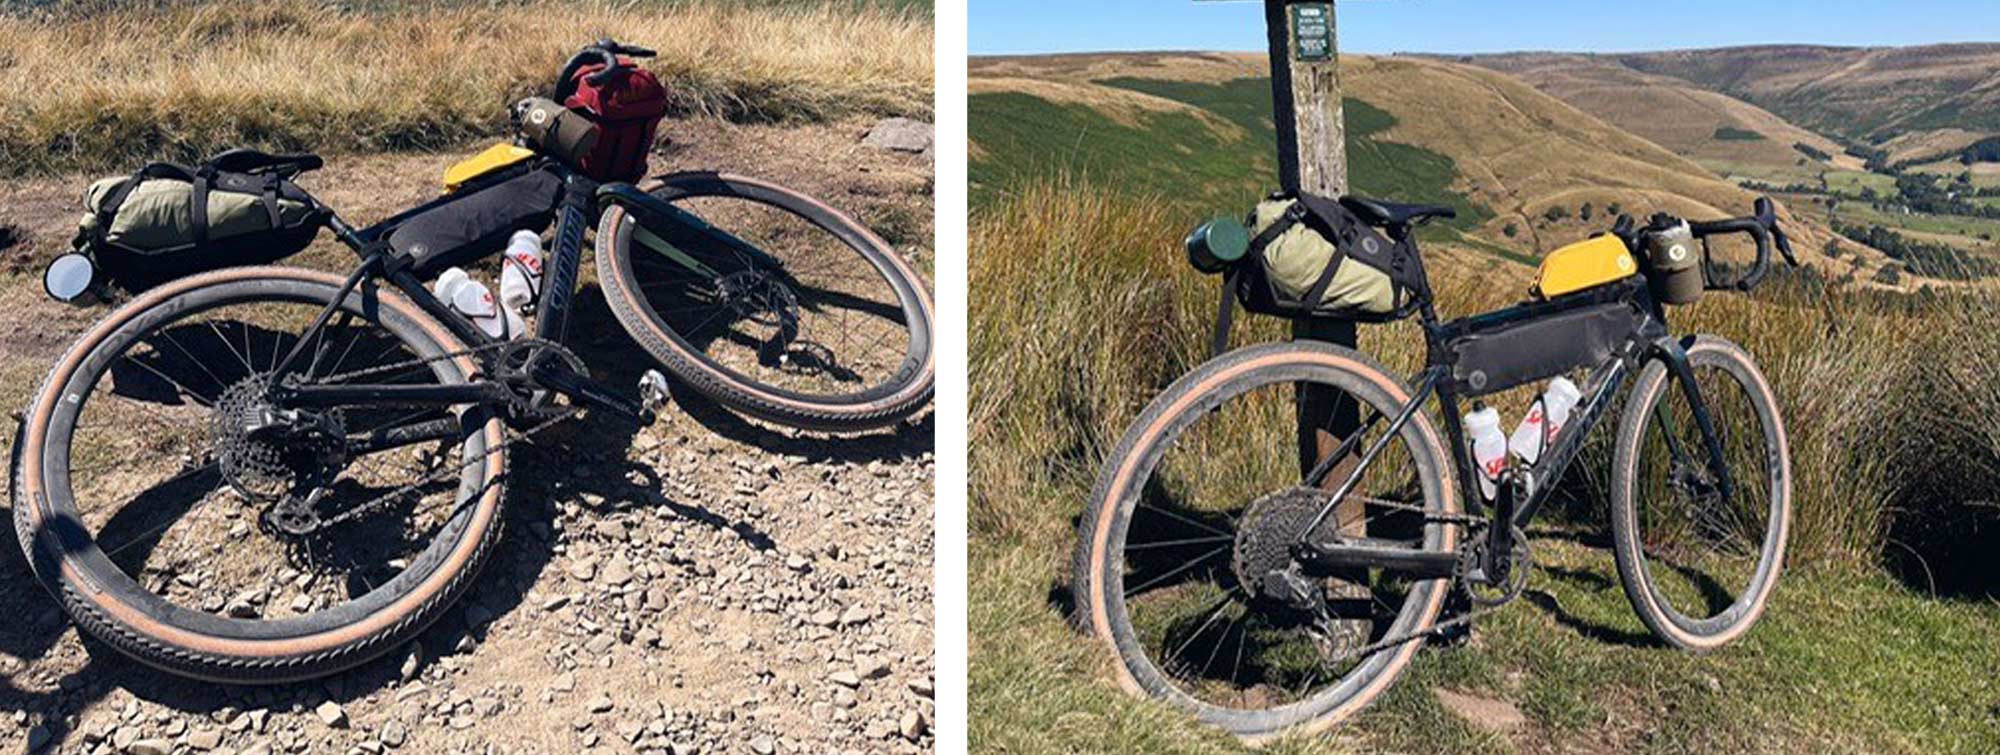
Gravel/Adventure
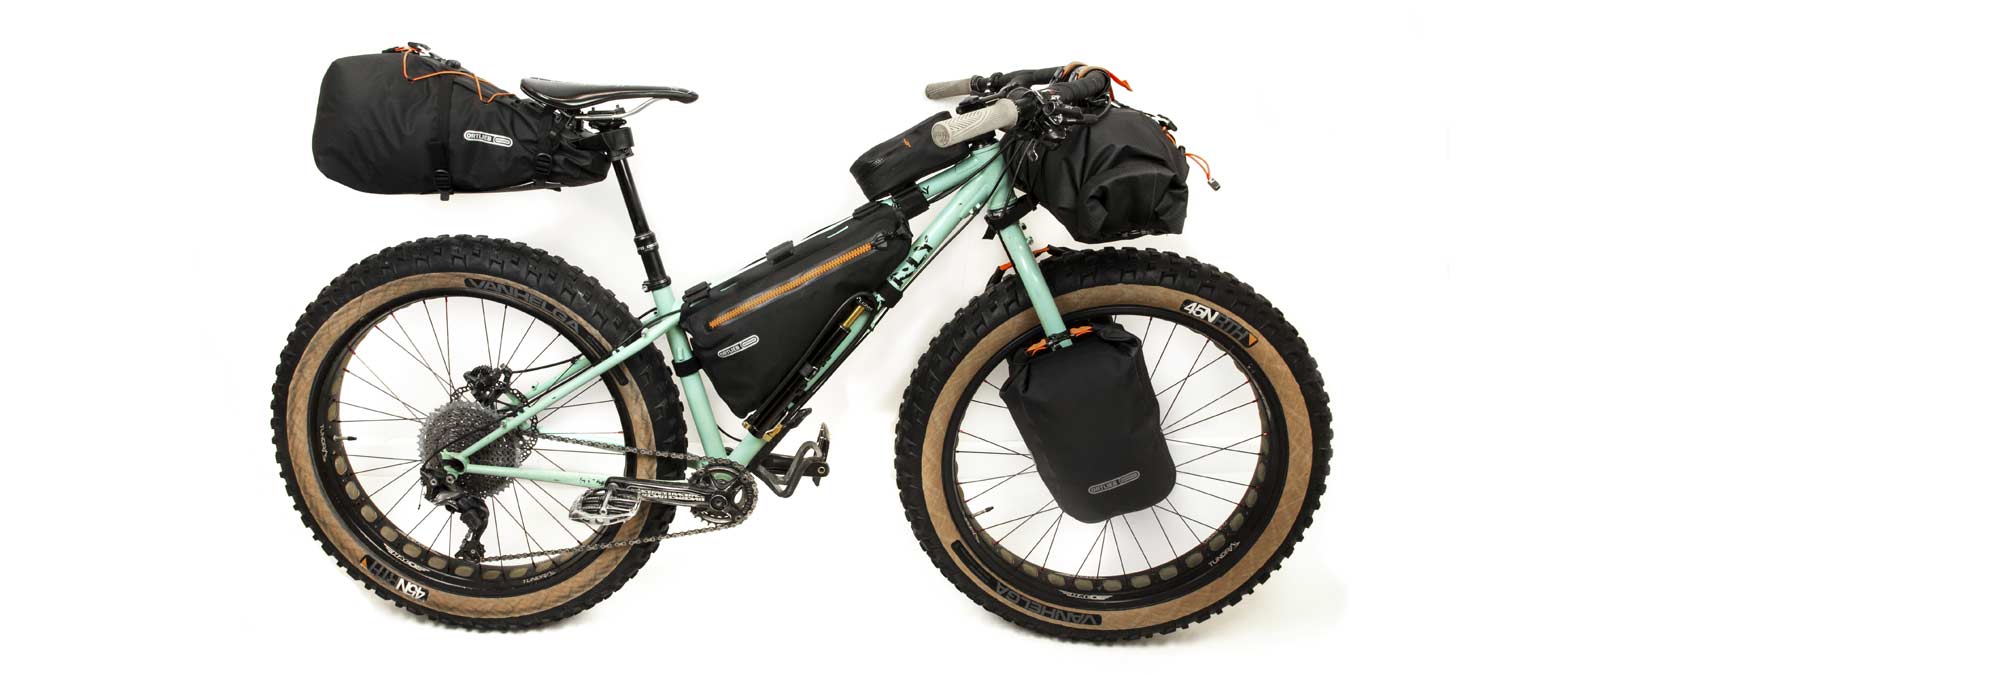
If you are using unpaved roads, forestry tracks and other offroad routes, then a gravel/adventure or mountain bike with more aggressive tyres and front or full suspension may be preferable. Full suspension mountain bikes tend to house the rear shock within the main triangle of the frame, reducing the available space to pack luggage in this area. Also, rear mounted bags that attach under the saddle can reduce the range of a dropper seat post making technical descents tricky with a raised saddle.
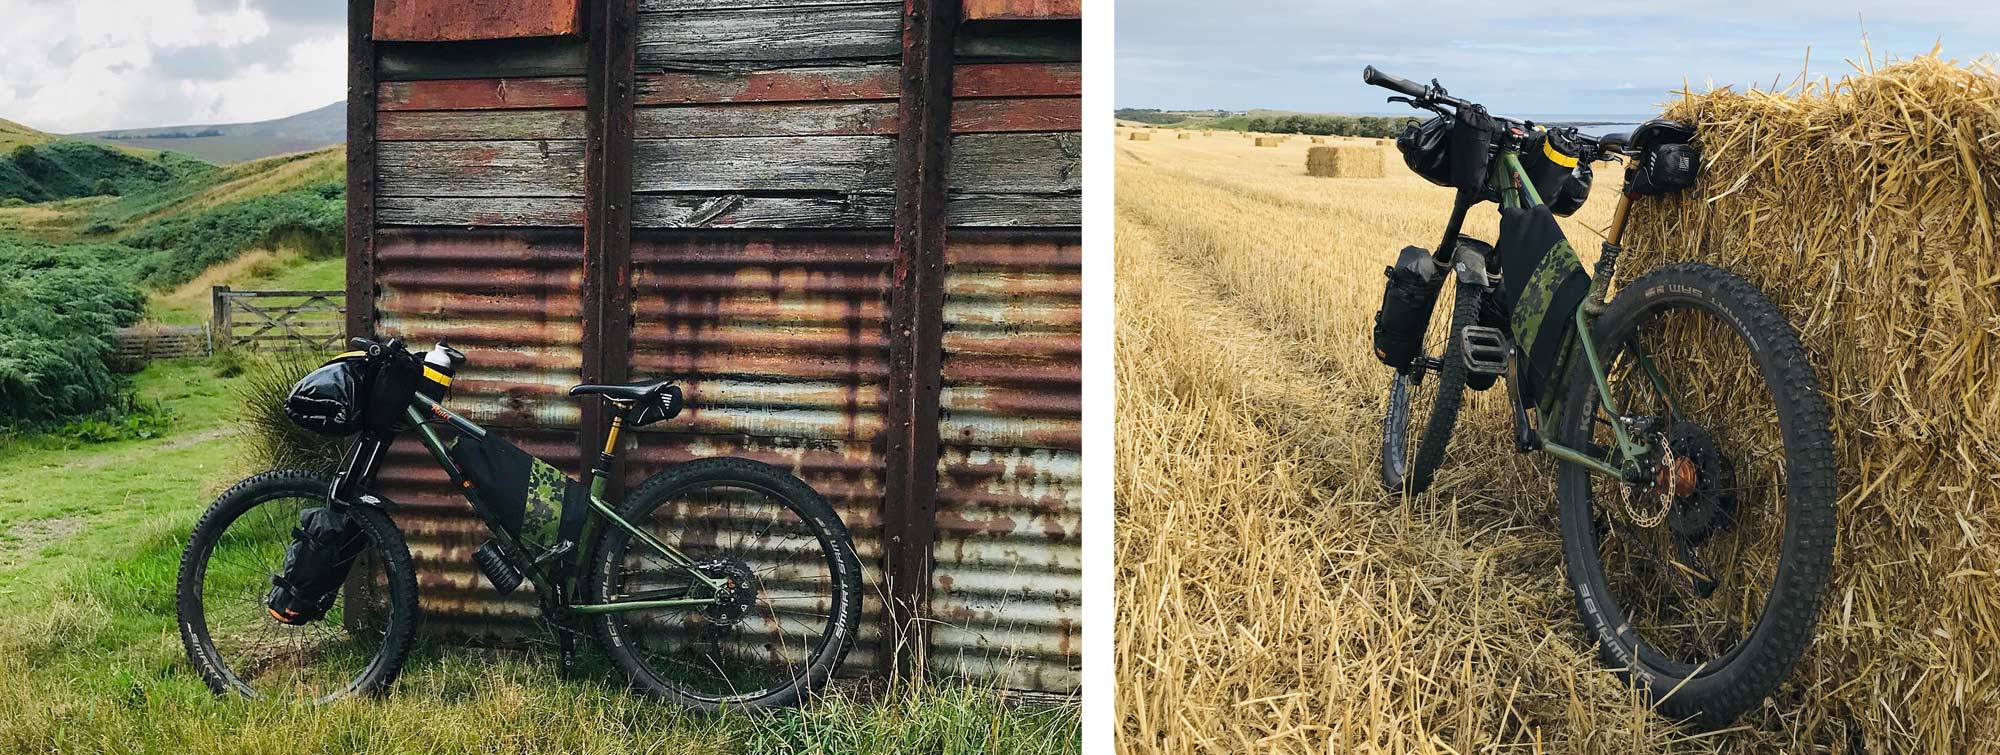
Mountain Bike
For extremely rugged terrain, you may be required to carry your bike (hike-a-bike). In this instance, a load split between the bike and a rucksack is advantageous, as it not only reduces the weight of the packed-up bike but also the rucksack acts as protection against your back and the bike can hook onto it to take some of the weight and add an element of comfort.
If you are planning a hilly route then ensure your bike has a low enough range of gears to pedal up the gradient, otherwise you will be ‘pushing’! Although a moving bike takes most of the weight as a rolling-mass, the weight becomes apparent when you need to push, lift or carry, so selecting a lightweight kit is still as important as backpacking.
E-Bikes
E-bikes have become very popular in recent years and can be used for bikepacking too. Be mindful of how much range you have in your battery(s) and if there are recharging points along the way. Riding predominantly in ‘Eco’ mode will significantly extend the range of your battery, saving the power assistance for hilly sections. Batteries are affected by the cold, so consider the reduction in range if riding in cold conditions.
Considerations
Before setting out, make sure your bike is in good working order and carry some basic tools for trail/roadside repairs in case of emergency. Carry a spare inner tube(s), puncture repair kit/patches and a pump; quick link(s) the correct size for your chain is a speedy fix for a sudden snap. A multitool with a range of allen key sizes are vital too. Duct tape and assorted zip ties solve a multitude of issues not only on the bike, but whilst camping too. These basic items can get you rolling again pretty swiftly, so keep them handy when packing. Look after your bike and it will look after you!
Finding a way to attach the items you need onto the bike is part of the process. Planning a trip suitable for you and your equipment is an integral part of the journey.
Bags
Almost every part of your bike frame, handlebar and front forks can accommodate a bag. How these are attached, bag type and capacity will vary depending on the style of bike, terrain and duration of the trip. Before we get into what’s needed for when and where, let's look at the bag options for each part of our frame;
Rear Panniers
Panniers have been used for many years from commuters to expeditions all over the world. Tried and tested, this is what springs to most people’s minds when they think about bike bags. Pannier bags can carry greater loads and therefore are a versatile option for bikepacking and for commuters alike. A popular choice on long expeditions. Whilst panniers allow you to carry greater loads their use off road is limited to well managed trails due to the centre of mass being moved further to rear of the bike which results in less bike control in more technical/undulating terrain.
Rack Bag
Depending on the Pannier Rack used, an addition of a ‘rack bag’ can be beneficial for longer expeditions where more kit is required. This can be duffle, large dry bags or specific rack bags that are available from a number of brands. Simply pop this on the top of the pannier rack and lash it down to secure.
Front Pannier
Very much for the longer expedition type journeys, where a lot of kit is required, front panniers can add a great deal more load. The bags are no different to rear panniers, just the specific front pannier rack is mandatory for this bikepacking option.
 An alternative to the front pannier rack system comes in the form of Gravel Packs. These packs sit further down on the forks and tend to be lower volume to standard panniers, resulting in better handling especially on rougher terrain.
Saddle Bags
Saddle bags have developed a lot over the past 25 years and are now a popular choice for most bikepackers due to lighter weight streamline designs that allows us to tackle more technical terrain. The key component cyclists look for in a good saddle bag is the stability, as the dreaded ‘tail wag’ (swaying caused by an acute fixed point on the seat post and seat ensued by the side-to-side bike motion) is often a common drawback on this bag option. However, with innovation and well thought out designs, some brands have been able to minimise ‘tail wag’, and, in some cases, totally expel this issue. It is worth noting that particular care when packing your saddle bag should be taken, as some bags can tend to ‘droop’ if not tightly/correctly packed.

Top Tube Bag
Often only a small volume, this little bag becomes extremely useful whilst in the saddle. Anything you want to hand from your mobile phone, stacks, small multi tool etc. is what you’d want to include in this bag. For very little weight and no adverse effect to the handling of your bike, this (for me/us) is a ‘no brainer’ to be used for almost every ride.

Frame Bag
Frame Bags are great for stowing heavier items whilst keeping the centre of mass in the best place for the overall balance of the bike. On more technical terrain this balance is even more important and utilising a larger frame bag to centre more weight is worth considering.

Handlebar Bags
Some form of handlebar Bag is usually found on most cyclists' bikepacking set up, great for bulky, cylindrical items this space is often utilised to hold our shelter and/or sleep system (mat, sleeping bag etc). Depending on the type of handle bar (drops, flared drops, straight etc) and additional components such as racks will determine what can be used with your bike, i.e. roll, top loader or harness;
Roll

Top Loader

Harness – Various Strap-Drybag Combo


Handlebar Bags can often accommodate accessory bags that allows for extra accessible storage whilst in the seat

Fork Bags
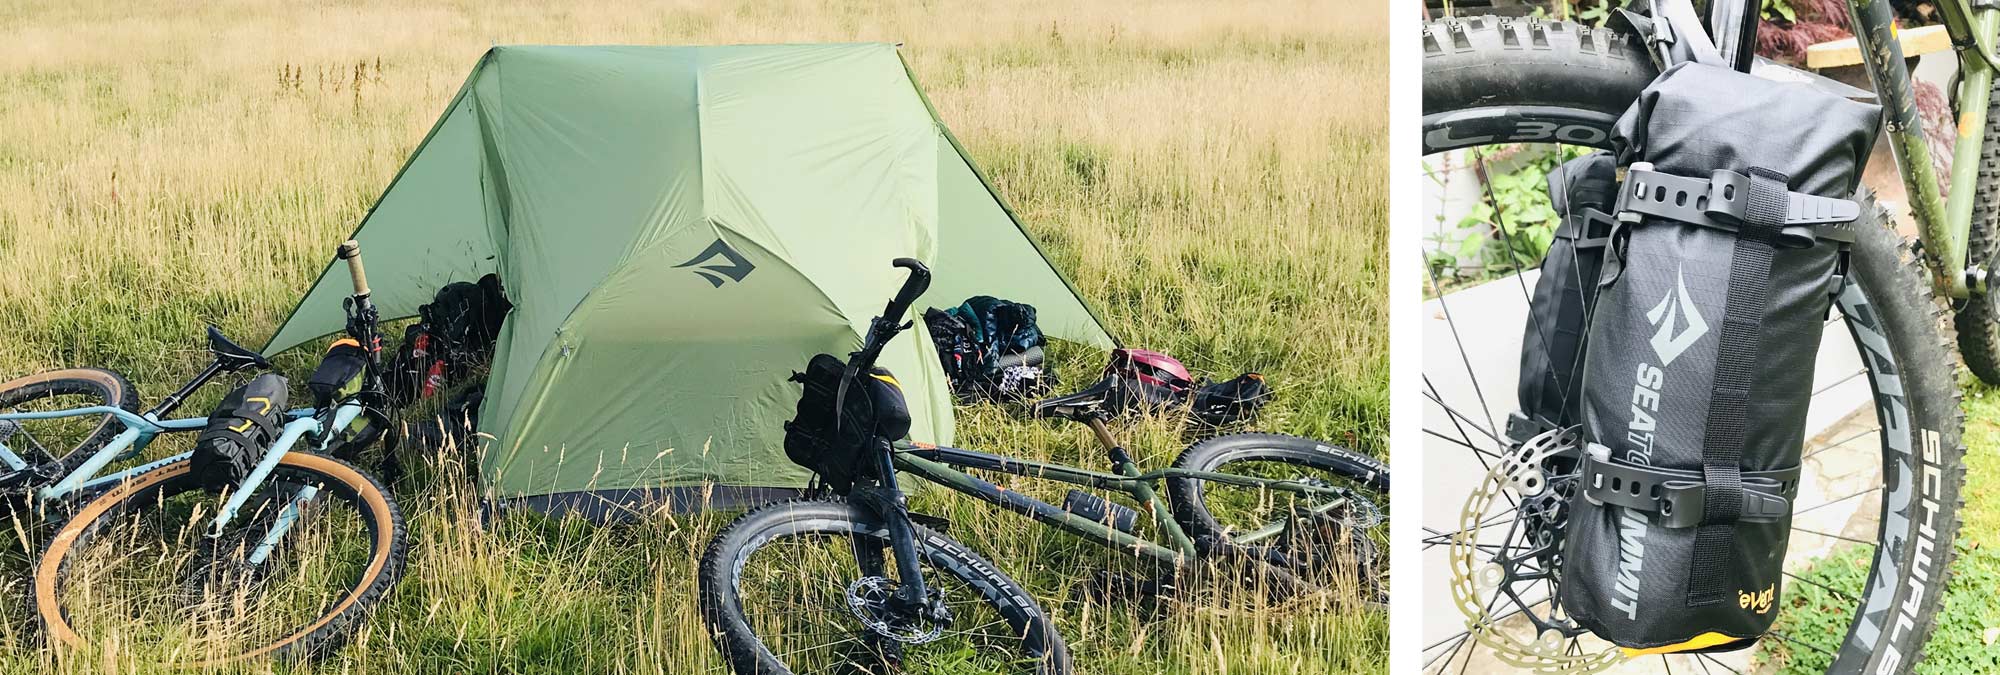
Adding more storage solutions on longer journeys or a way to balance the weight out throughout the whole bike, fork bags can be a great addition. Available in a multitude of size and attachment options, fork bags can be added to your bike via a number of configurations, such as; DIY use of straps/lashings to secure drybags, and; specific bags/cages that have been designed to be attached directly to mounting points on the forks.


Dry Bags
Dry bags can be attached on your bike using the pannier rack, handlebar harnesses, fork cage and pretty much anywhere using appropriate straps. Available in a large range of sizes and relatively cost effective, this ‘DIY’ option is a great way to add additional packing options to your bike. When choosing the best dry bags consider denier; this is important as we will require a tougher fabric due to the likelihood of the bags experiencing higher abrasion. Although the higher denier will add more weight, I’d suggest a minimum of 50 Denier for any external drybags. Although lighter drybags are great for internal storage.

Rucksacks
Whilst we may want to do away with a rucksack when bikepacking, the necessity to pack the kit we need may require this additional space or it may prove beneficial to have a lighter bike on especially technical/rough terrain. A rucksack may be the answer for extra warm kit during winter months, carrying water in warmer climates to be drunk on the go via an hydration straw, and/or when your bike bags simply cannot fit everything in. We’d suggest no more than a 25L pack that utilises good ventilation through the back system and is compatible with a water bladder.
Bag Accessories
There are a multitude of accessories we can add to our frame and/or bags, using webbing, lashings and paracord to name but a few. It is always advantageous to carry a few in case of running repairs, or, to attach further items that may be collected on our biking adventures.
The Set up
Each bike type will be better suited to journey length and terrain type, therefore specific set ups are called for if looking for your bike to either; carry greater loads, be more agile on technical terrain or chew up the miles. Please note each of the below set ups can be applied to most bike types.
Rough/Technical Terrain

Very little weight on the rear and front of the bike to allow for a more agile/sharper handling. Most of the mass is best centred on the bike via the rucksack and/or frame bag (full suspension bikes may be unable to accommodate a frame bag) to better balance the bike on technical terrain. Usually trip lengths of 1 - 2 days for this set up.
Gravel
Weight spread evenly from front to back, still with heavier items stored in the frame bag for better balance. The bike should still be agile enough for some technical/ rough terrain, however not so much that it can take-on downhill single track. This kind of setup is best utilised for 1-14 days with regular opportunities to resupply.
Expedition
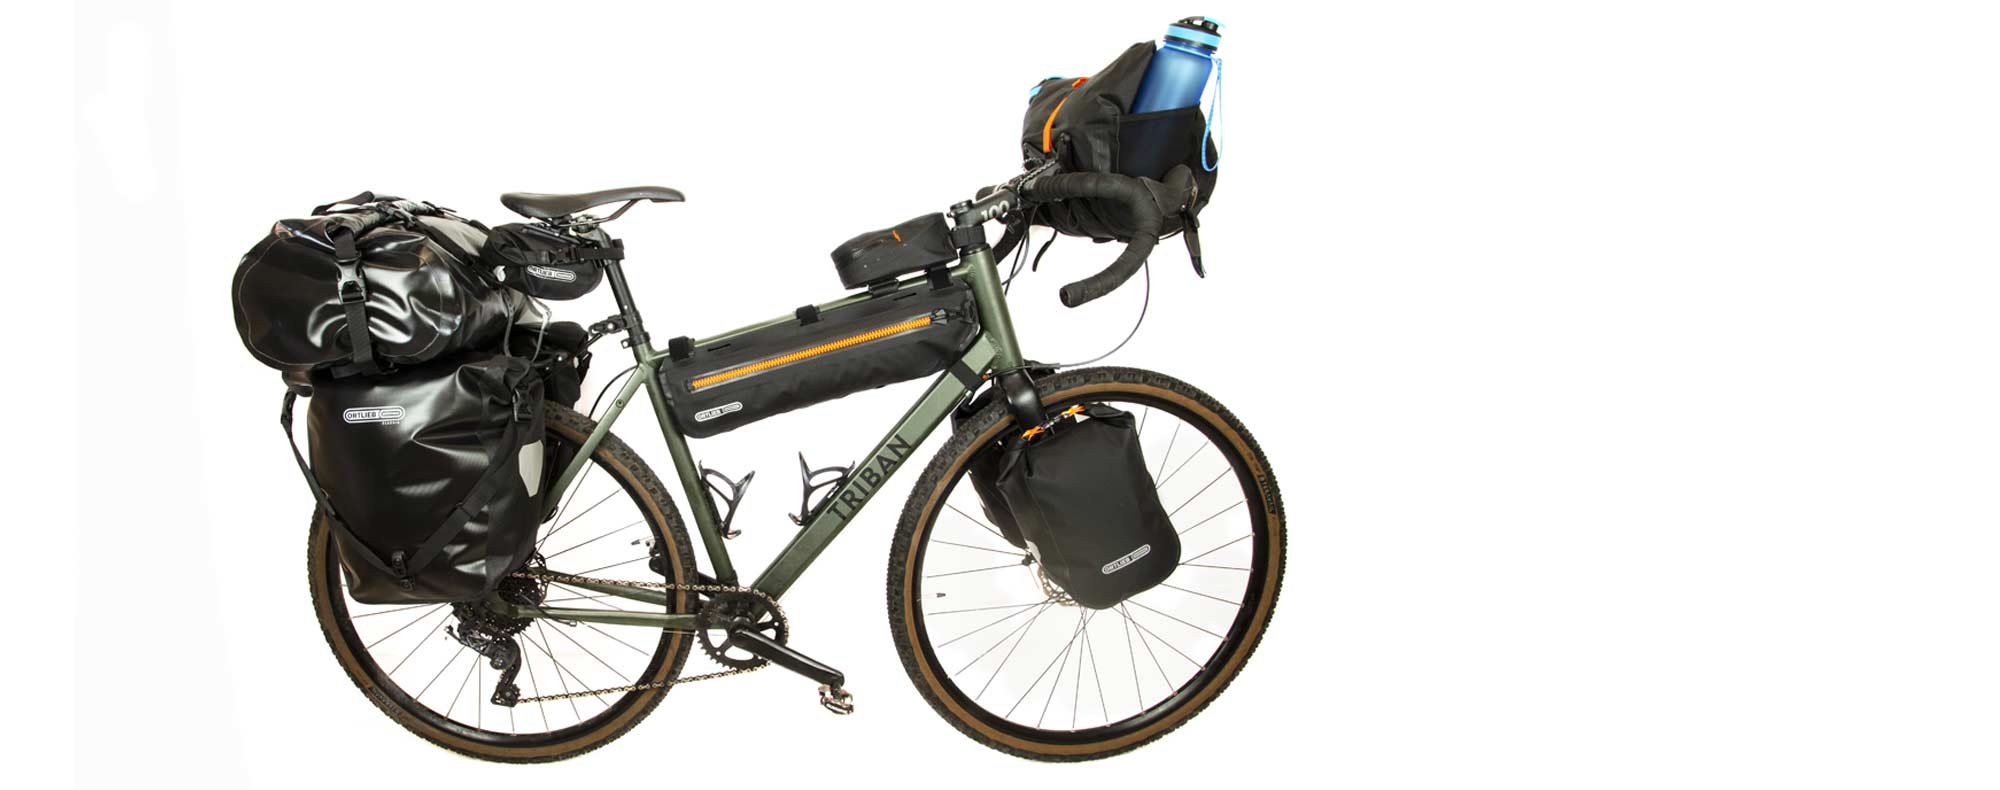
This will be a heavy bike, with most of the weight loaded at the rear. Bike handling will be diminished and therefore terrain will be, more often than not, resigned to well maintained tracks, trails and tarmac. Not to say that you can’t hop out the saddle to push past any rougher going/impassable terrain. This setup is for those looking for long, totally self supported adventures lasting 5 days to multiple weeks/months with little to no opportunities for resupply.
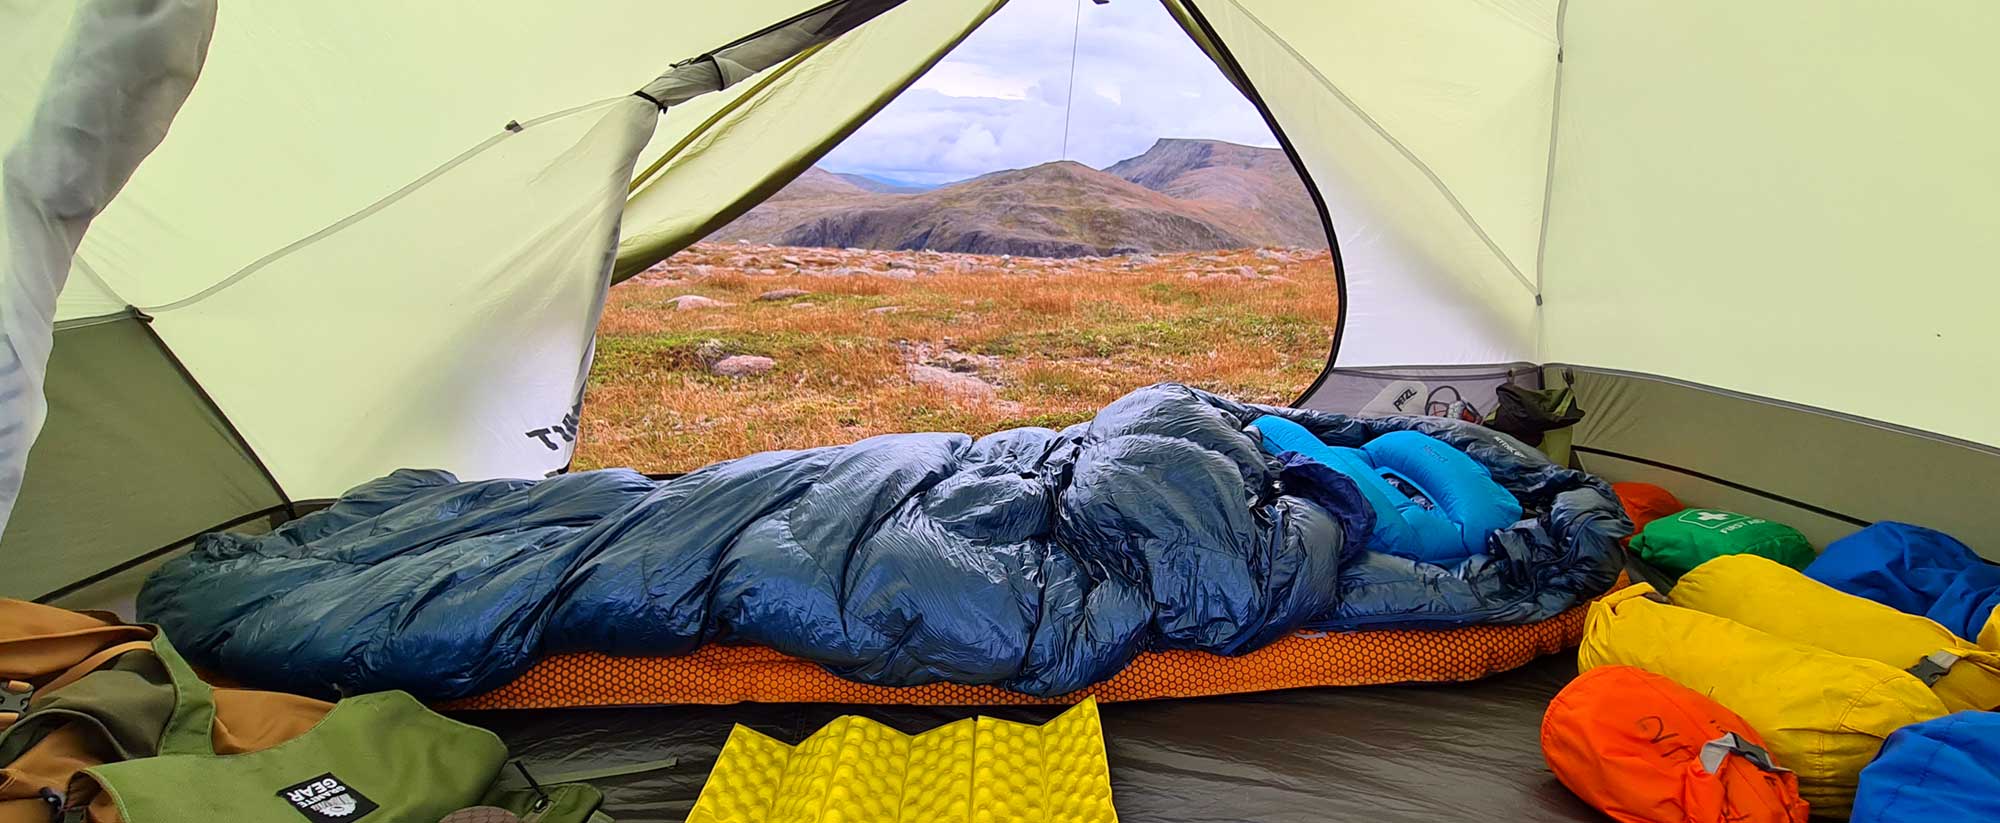
Shelter
Bikepacking options for overnight accommodation vary greatly, be it an overnight or longer tour in hotels/B&Bs or a fully self-sufficient remote wilderness trip in a tent or under a tarp. The latter requires more equipment and preparation, unless the hotel has a strict dress code!
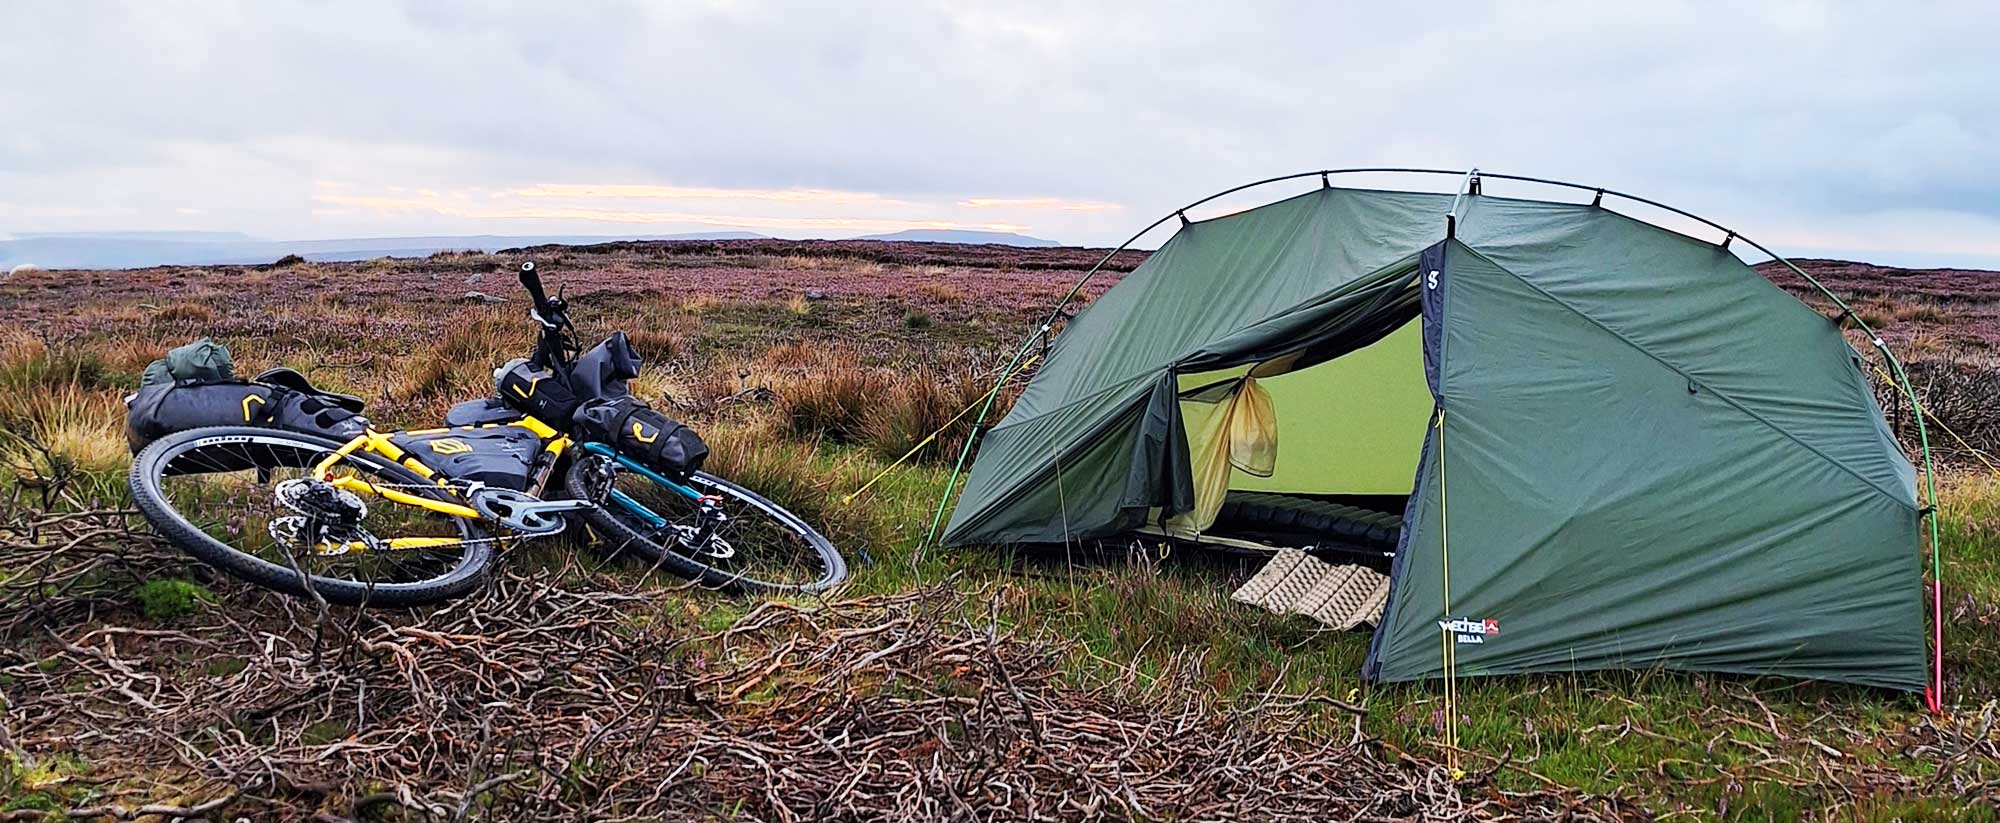
Bikepacking Tents
Bikepacking specific tents have shorter pole lengths than the standard tents, this is to aid packing, particularly in short handlebar bags and panniers. Some have additional storage and drying capabilities and somewhere to put dirty gear, others have fixings to attach the packed tent directly onto the bike. Bikepacking specific tents are generally designed for 1, 2 or 3 people, so sharing the load is advisable, just ensure that all components are packed before setting out.
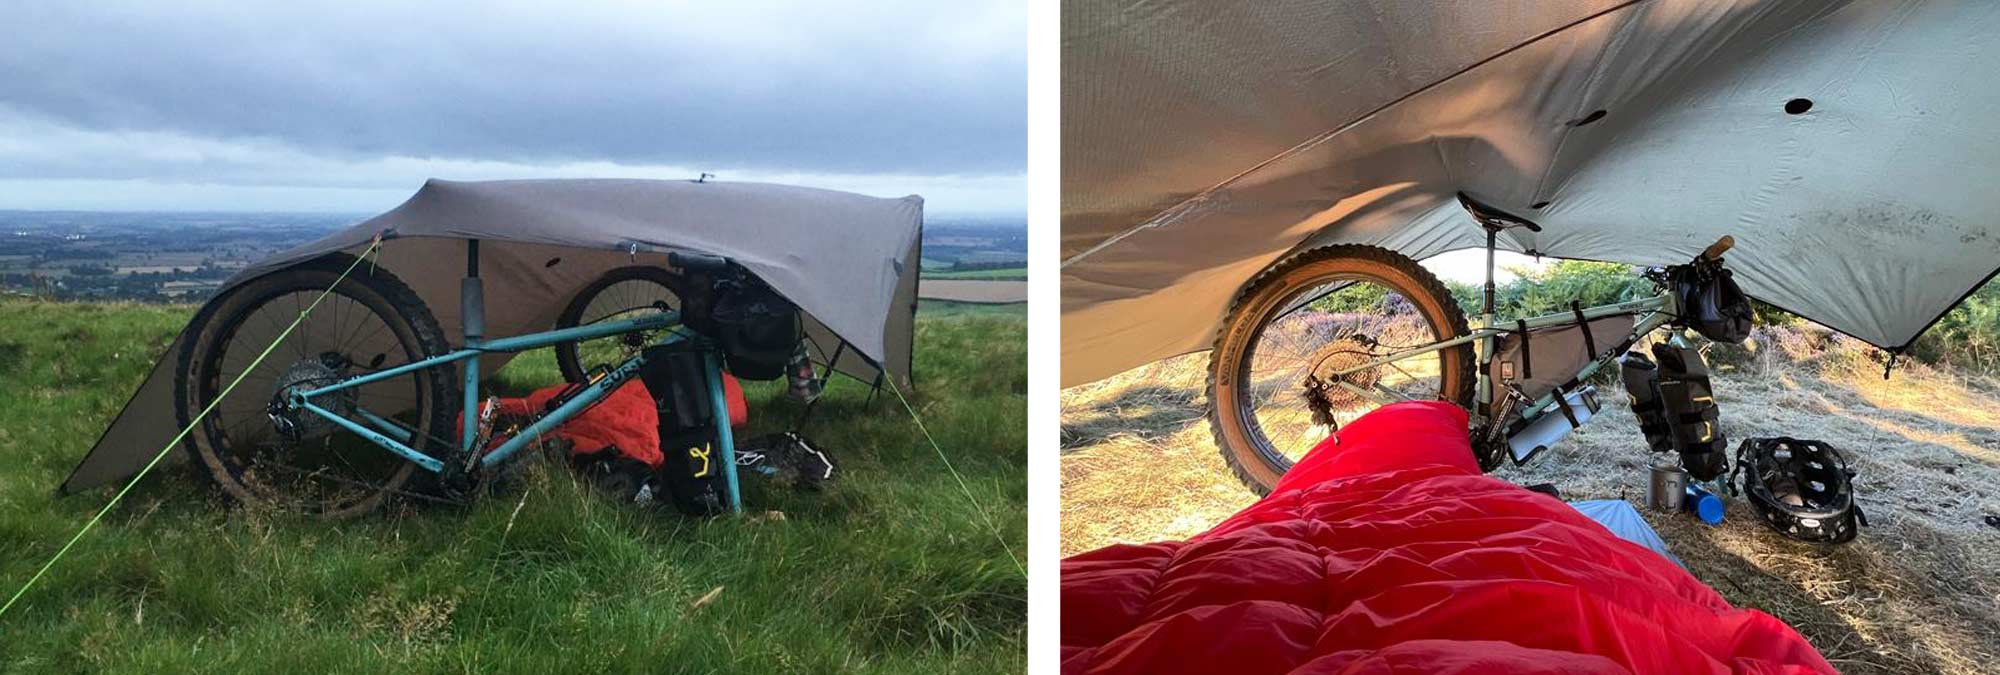
Tarp/Bivy Shelter
Tarps are ideal for bikepacking too, even if there are no trees to attach to, as it is possible to use the bike as a prop at the higher end and the front wheel at the other. There are many other configurations too, depending upon: the size of tarp; how many people/bikes will be using it and the weather conditions. Tarps are a light-weight option and ideally used in conjunction with a bivy bag. They are suitable for trips of varying length.
It is beneficial to have your tent accessible as this is likely to be the first item you will need when you arrive at camp, especially if the weather is inclement and shelter is required swiftly, whilst keeping other items dry. Be mindful also to store a damp tent/tarp away from dry items when packing up and moving on. Use of dry bags is vital for this segregation.
Sleep System
Gone are the days when you used to accept that camping meant you wouldn’t be sleeping well, as there are now some incredible pieces of kit that pack down small and keep you as comfortable as if you were in your own bed back at home.
No matter where you are in the world or the time of season, if you ride through a beautiful day there is always a chance that come night time the temperature can drop significantly. For comfort, select a sleep system that is appropriate to the expected night time low temperature.
Sleeping Bags/Quilts
Choosing a sleeping bag can be a daunting task. With so many different options and variations, it can be difficult to get started. This will be one of the biggest investments, along with your tent, for bikepacking so it's important that you make the right choice for what you need.
We genuinely want you to pick the best sleeping bag for your adventures so we've put together a simple guide to help you narrow down the options for your search. - Four Steps to Choosing a Sleeping Bag
Sleeping Mats
The key factors to take into consideration when choosing a sleeping mat are the pack size, weight, your budget and most importantly what time of year you will be using it which determines the level of insulation you need. For further information on selecting the right bag for your needs, read our guide on Choosing a Sleeping Mat.
Pillow and Liners
A pillow can add the extra bit of comfort needed after a long day in the saddle, so, if you have space we’d suggest adding one to your kit list. There are many options that pack down smaller than a pair of rolled up socks so finding the space shouldn’t be too hard.
Whether you want to bring a liner is up to you. I personally take a liner with me all year round, as with a pillow, they take very little room. Some are listed as being able to add anything from 2-8°C which makes a massive difference when it’s needed. Liners are also hygienic as they can be laundered regularly, keeping your sleeping bag clean.
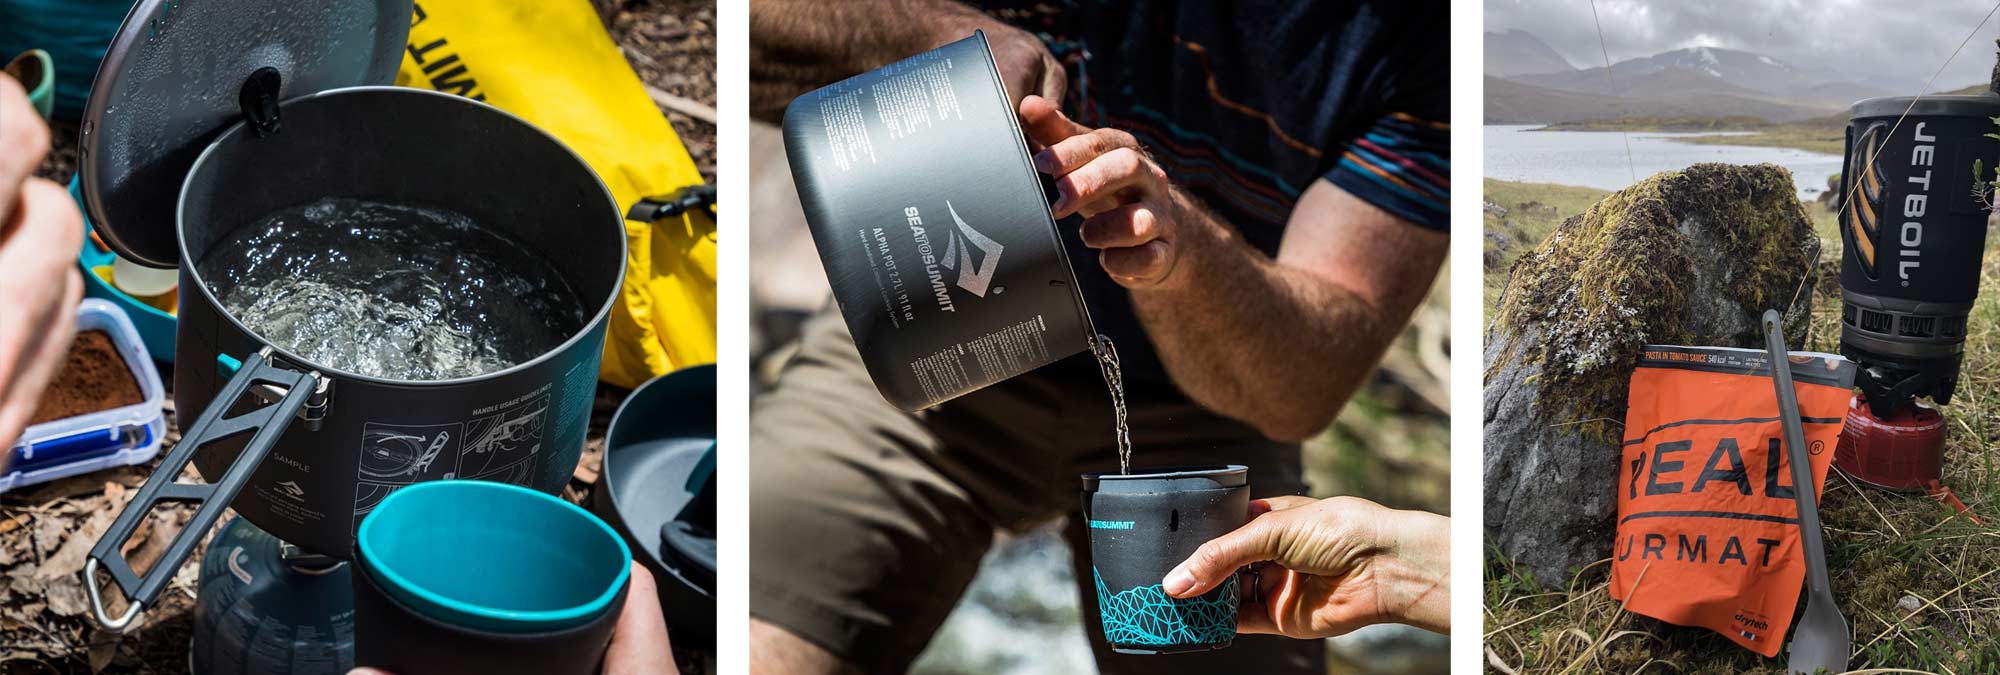
Camp Kitchen
Depending upon your type of trip, you may opt to be self-sufficient in the food department and having a compact and efficient cooking system is essential.
Whether you are cooking fresh, locally-sourced food or rehydrating packed meals, you will need to be mindful of the amount of fuel you will require for the duration of your trip or what refuelling options will be available to you – this will probably dictate the type of stove and fuel you will need.


For more information, why not look at our Stove Buying Guide
Dehydrated meals are light to carry and pack a punch for calorific value, be it a breakfast to prepare you for a day in the saddle, or at the end of the day as a hearty meal to refuel and replenish a depleted body. These meals can be eaten directly from the pouch after rehydrating with boiling water, and I’d suggest a long handle spoon/spork to get to the corners.
Try to have pots, pans, cups etc that fit inside each other to minimise overall size. Some pots can fit a gas canister and stove inside too.
If you are off-grid and away from a regular supply of fresh water, then a water filter will help maintain a level of drinking water clear from toxins and impurities. Aim to refill before you need to, in case you struggle to find a suitable source to filter from. Keep a bottle handy to drink from regularly or carry a hydration bladder in your backpack and then use a collapsible bottle to store surplus water, as these reduce in size as the water is used. Water filters vary in size, flow rate and the list of impurities that it filters. Choose a filter appropriate to where you are going and how much fluid you will need to filter.
Closing Word
Travelling on two wheels makes for a real adventure, whether setting out solo or with friends, for one night or for months, there is nothing like bikepacking that induces the sense of freedom. Hopefully this guide will provide you with some insight on things to consider when planning your bikepacking adventure, from the type of sleeping bag you need, to, the most appropriate bike setup for your trip. If you have any specific questions or would like further advice please do not hesitate to get in touch with us at customer.service@ultralightoutdoorgear.co.uk or call us on +441740 644024.
 |
||
 |
||
| Chris Futers |
||
|
About the author: Chris fully immerses himself in many outdoor sports and challenges. Whether it's Multi-day hikes, Rock Climbing, Kayaking, Trail Running or Bikepacking, the allure of the outdoors is his true passion. Chris likes to test himself against the wilds, taking on multiple challenges/events such as the Lakes Travers Trail Race, TGO Challenge and Cycling the Coast to Cost (C2C) to name a few. Having worked and volunteered as a coach/instructor for multiple outdoor sports and pursuits, Chris likes to help others achieve and connect with the outdoors, always eager to pass on his knowledge and experience. Chris is our Customer Service Team Leader, joining the UOG team in 2020. |
||
|
||
 |
||
| Lois Fife | ||
|
Lois is a keen cyclist and is always plotting a route… either for her next trip or looking for a different way to commute to work! She is regularly seen heading for the hills on a packed-up bike, be it for a quick overnight wild camp, or a longer multi-day adventure. She is currently plotting her route to walk the TGO across Scotland. She is a British Cycling level 2 leader and has been involved with MTB Guisborough encouraging the next generation of mountain bikers. Lois joined Ultralight Outdoor Gear in 2021 and is part of the Customer Service Team. She is always keen to get her hands on new kit to try in the field and share her findings on the website. |
||
|
||
 |
||
| Rob Farquhar |
||
|
Rob has always enjoyed being on a bike ever since he was a child. He tries to enter at least one mountain bike event a year. Since moving closer to the Yorkshire Dales and now the North York Moors he’s started to do more walking and in late 2024 became the 450th person to complete the Liechtenstein Way. He has completed the Coast To Coast (C2C) on his mountain bike, the Yorkshire 3 Peak challenge twice and has attempted to hike up Ojos Del Salado; the highest peak in Chile. His aim for 2025 is to complete the Cleveland Way over several weekends with his Dad who suffers with mobility issues due to Parkinson's. Rob has been working in the outdoor retail industry since 2012. |
||